-
 Top Aline
- Terms
of use
- 2
Tubes
-
Plugin & BGK Designer sf10I
-
Toadies Plugin
-
AFS Import plugin
-
Eml Tutorial
HERE
-
Video HERE
-
PSP Effects
-

Script
Click on the butterfly to follow the tutorial

Let's start!!!
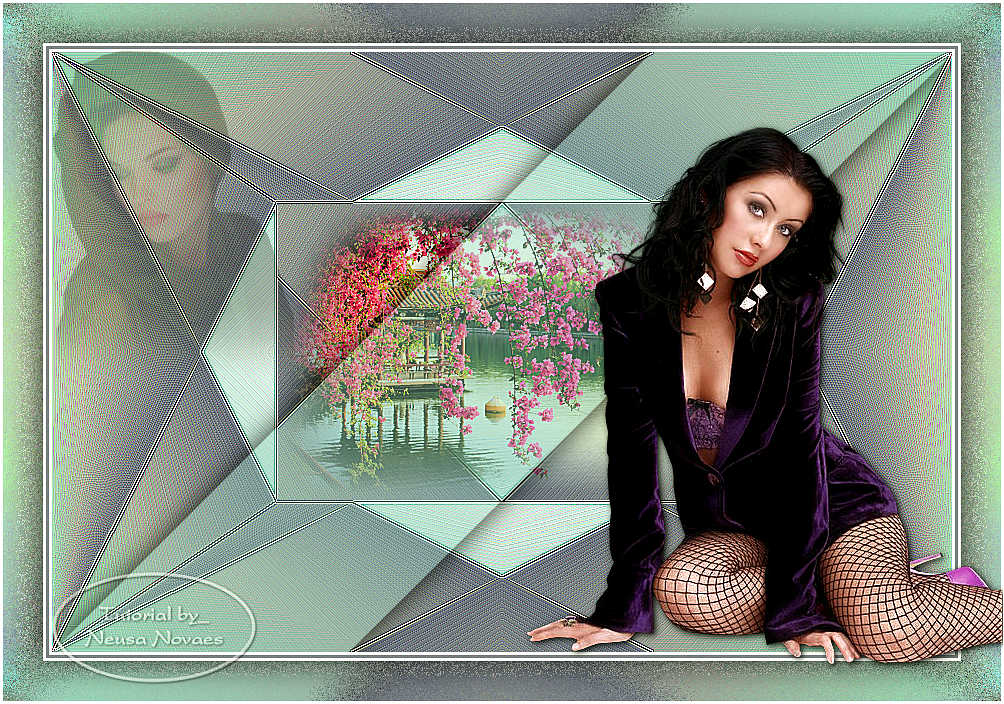
1.- Open your transparency 900 x 600 px
2.- Open your tubes and minimize
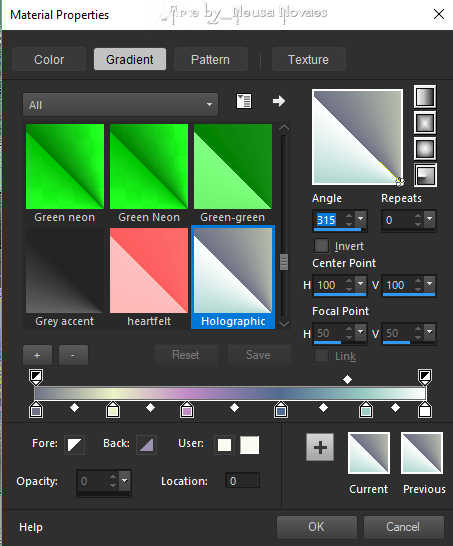
3.- Locate your Holographic gradient and make a Radial gradient as printe
4.- Fill your transparency and take two colors to the dark foregraund and clear
backgraund
5.- Plugin Toodies> What Are You as opens = 20 - 20 being - twice
6.- Layers> Duplicate and Image> Mirror
7.- Blend Mode = Darken and then Layers> Merge> Merge Down
8.- Image> Flip and then Effects> Edge Effect> Enhance More
9.- Layers> Duplicate and Image> Flip again Blend Mode = Darken again
10.- Layers> Merge> Merge Down
11.- Layers> New Raster Layer
12.- Selections> Load / Selection from Disk and locate sel_ncn_0150
13.- Fill 40% with your backgraund
14.- Apply Drop Shadow = 0 - 0 - 80 - 40,00 black color and remove the
selection
15.- Activate Raster 1 and Layers> New Raster Layer
16.- Fill with your previous gradient (100%)
17.- Plugin & BGK Designer sf10I> Alfs Border Mirror Bevel = 128 - 64
18.- Layers> Duplicate
19.- Image> Mirror and Blend Mode Darken
20.- Layers> Merge> Merge Down
21.- Layers> Duplicate
22.- Image> Flip and Blend Mode Darken
23.-Layers> Merge> Merge Down
24.-Effects> Edge Effect> Enhance More = 2 times
25.- Layers> New Raster Layer
26.- Selections> Load / Selection from Disk and locate sel_ncn_0151
27.- Open your landscape tube Edit> Copy
28.- Edit> Paste Into Selection
29.- Adjust> One Step Photo Fix and then Adjust> Sharpness> Sharpen or Sharpen
More
30.- Layers> Merge> Merge Visible and Edit> Copy
31.- Image> Add Border = 3px white color
32.- Image> Add Border = 3 px matching color
33.- Image> Add Border = 3 px white color
34.- Selections> Select All
35.- Image> Add Border = 40 px white color and Selections> Invert
36.- Edit> Paste Into Selection
37.- Plugin & BGK Designer sf10I> Blur'em! = 14 - 12
38.- Selections> Invert and apply drop shadow = 0 - 0 - 80 - 50,00 black color
40.- Selections> Select None and Image> Add Border = 3px white color
41.- Open your main tube Edit> Copy
Edit> Paste as New Layer - resize and position to taste
Put light shade to taste (if necessary put Sharpen)
42.- Open your other tube Edit> Copy
43.- Edit> Paste as New Layer and position to taste also being Opacity 30%
44.- Put mine and your mark
45.- It is optional to apply the AAA Filters Plugin> Custom
(I put Landscape)
46.- Save in JPG

** Tutorial created by Neusa Novaes **
August 21, 2017
Copyright reserved
Any similarity is purely coincidental.
Prohibited total or partial transfer, copies, alterations
publication in websites or blogs, without author's authorization.
NOTE: - Do not forget to put the credits to
whom right
-
 Credits
Tubes: - Mine and removed from the net without authorship
Selection: -Neusa Novaes
|