1 Tube Script Click on the butterfly to follow the tutorial
Let's start!!!
1.- I put it in Foregraund #
cc0530 and Backgraund #
3c0606
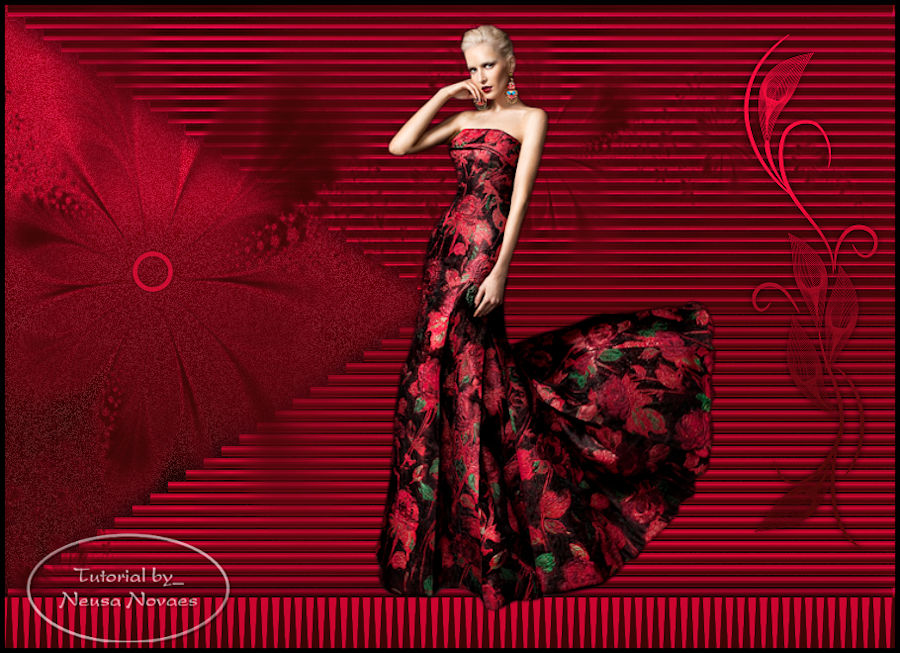
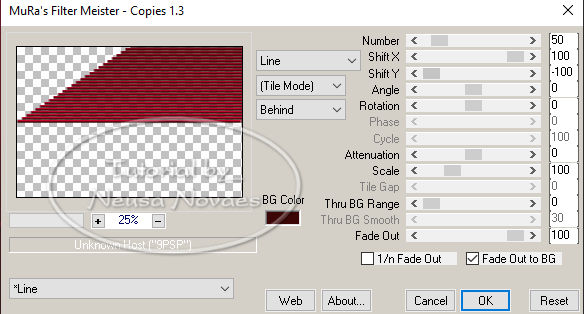
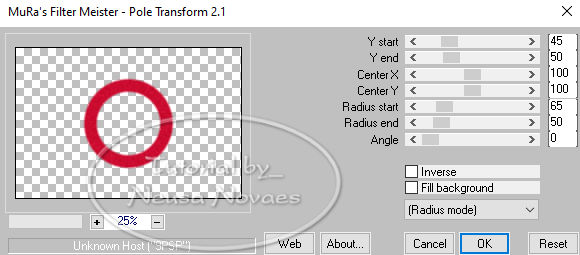
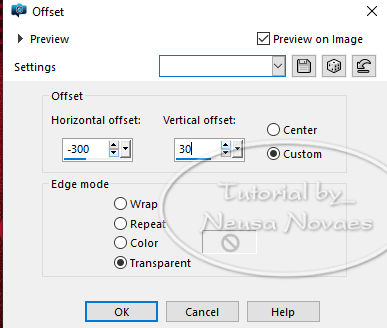
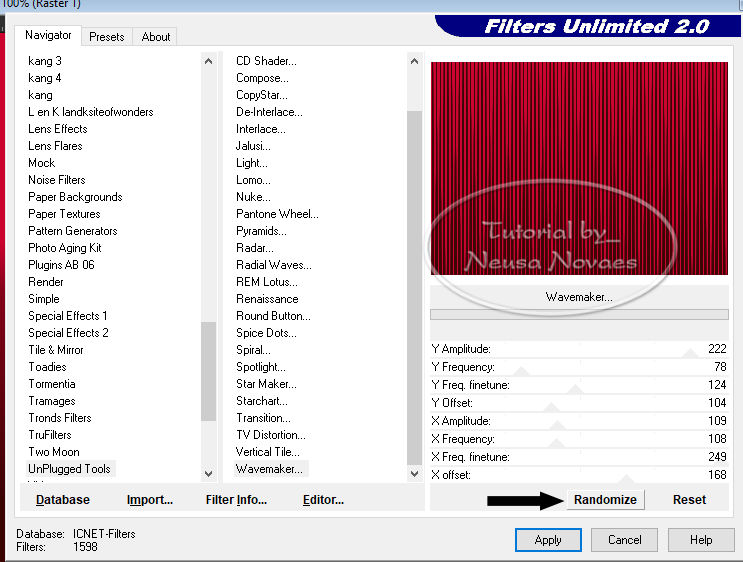
3.- Layers> New Raster Layer 4.-With the rectangular selection tool, make a selection as shown 6.-Objects> Align> Center in Canvaz 7.-Muras Meister Plugin> Copies as shown (if your image doesn't look the same, duplicate the line and continue) 9.- Duplicate and Image> Vertical Mirror and Merge Down 10.-Activate raster 1 and Adjust> And / Remove Noise> Add Noise = 30 Uniform and Monochrome clicked 11.- Activate Copy of Raster2 and apply Drop Shadow = 0 - 0 - 80 - 30.00 in black 12.-Activate raster 1 again and duplicate 13.-Muras Meister Plugin> Pole Transform as shown 15.-Activate Copy Of Raster 2 and apply Emboss 3 16.-Layers> New Raster Layer and fill with your Backgraund 17.-Apply mask Suiza 029 and Merge Group 18.-Activate Copy of Raster 1 and take it to the top 19.Resize 20% and again Resize 60% 20.-Image> OffSet as shown 22.-Layers> New Raster Layer 23.-Apply brusch to your liking with the colors of your gradient 24.-Adjust> One Stef Photo Fix and apply Drop Shadow in the same configuration in black 25.-Activate Copy of Raster 2 and apply Drop Shadow to taste 26.-Merge Visible 27.-Image Canvaz Size = 900 x 650 with 50px in the button 28.-Layers> new Raster Layer and fill with your gradient 29.-Plugin UnPlugged Tools> Wavemaker as per print (to stay the same, just click randomize several times) 31.-Apply Drop Shadow to taste 32.-Open your main tube Edit> Copy 33.-Edit> Paste as New Layer 34.-Image> Resize 70% and put to taste 35.-Adjust> Sharpness> Sharpen 36.-Apply drop shadow to taste 37.-Image> Add Border = 5px in black 38.-Put your brand and mine 39.-Image Resize = 900 px 40.-Save as JPG February 11, 2020 Copyright reserved Any similarity is purely
coincidental.
Maun Tube:- Suiza Bella and exchange group Gradiente:-Suiza Bella |

