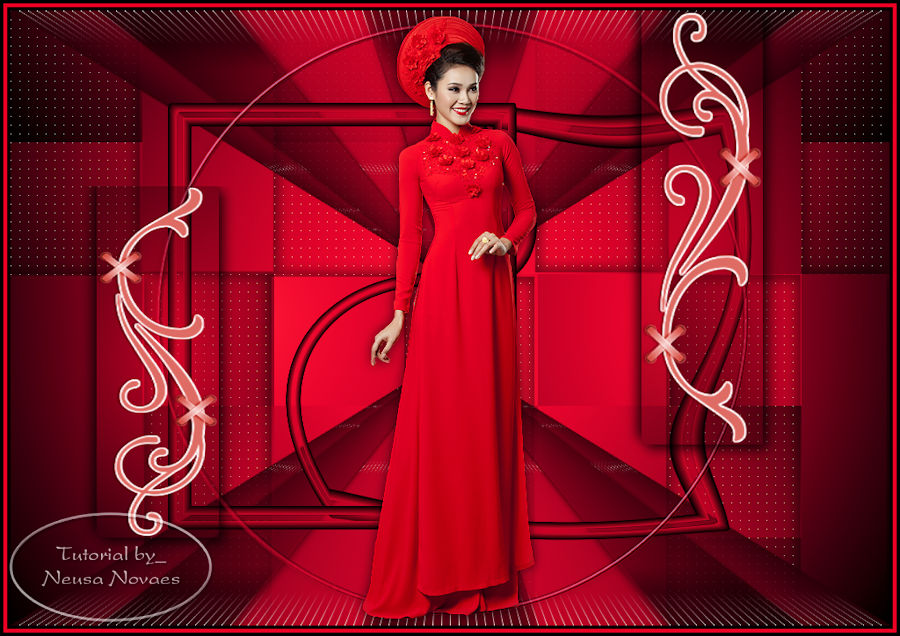
Script
1.- Open your Alpha_My_Smile 2.- Open your tube take two dark colors for Foregraund and clear for Backgraund and minimize I chose colors for Foregraund # 150d0a and Backgraund # e90129 3.- Locate a Radial gradient with Invert clicked according to printe 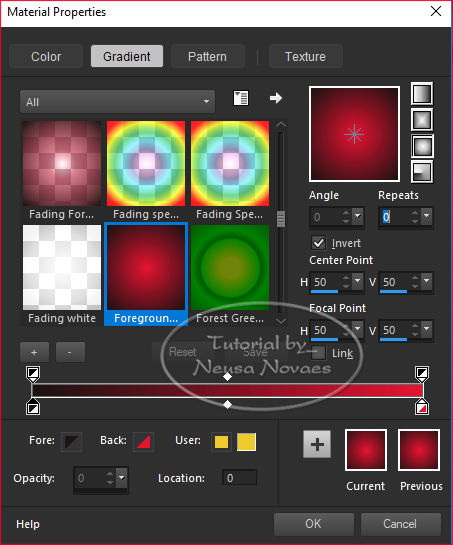 Fill your transparency with your gradient 5.-Adjust> One Step Photo Fix (Optional) 6.-Mehdi Plugin> Sorting Tiling according to printe 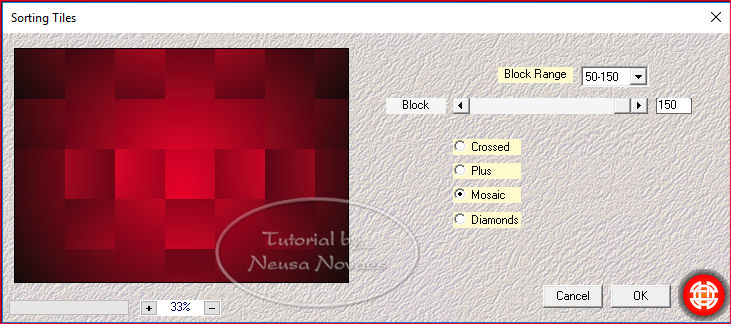 7.- Double 8.With the selection tool do according to printe 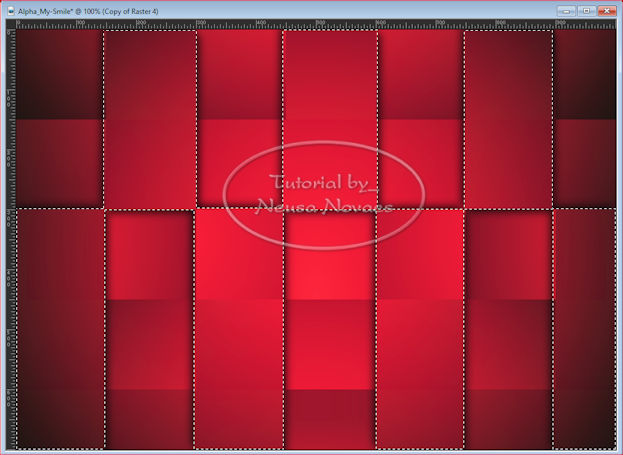 9.-With your DEL key on your keyboard delete 10. Apply Drop Shadow = 6 - 6 - 70 - 20,00 in black color 11.- Repeat item 10 negative 12.-Take the selection 13.-AP Line Plugin> SilverLining as printe 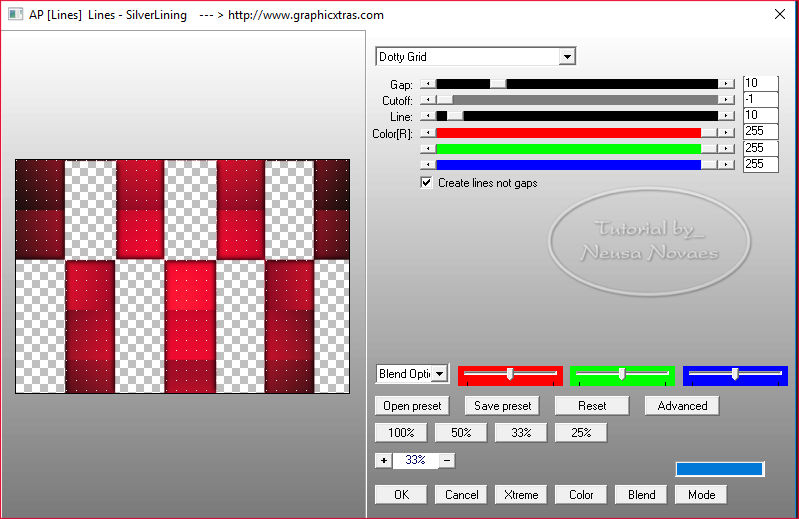 14.-Activate Raster 4 (Alpha Raster) and duplicate 15.- Layers> Arrange> Move Up 16.- Activate Copy (2) Of Raster 4 and duplicate also 17.- Layers> Arrange> Move Up also 18.-Merge Down 19, -Geometric Effect> Perspective Vertical as printe 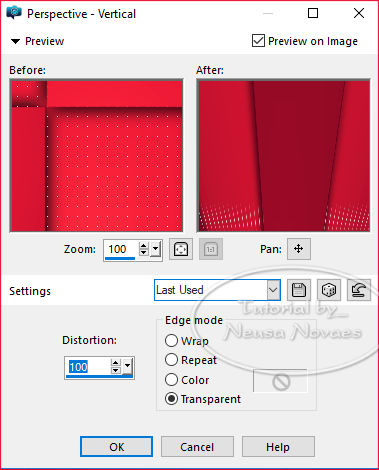 20.-Reflection Effect> Rotating Mirror as printe 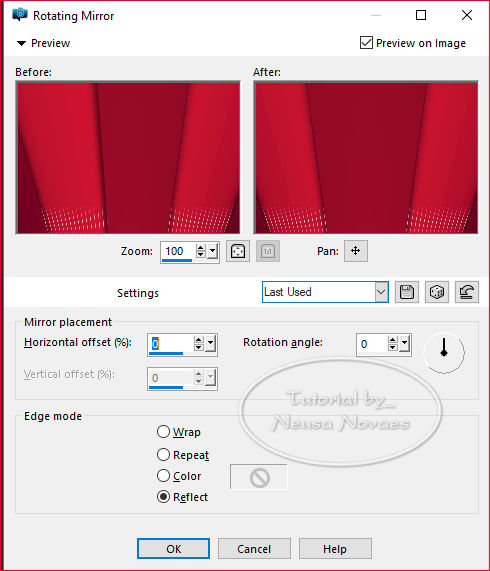 21.-With the Pick Toll Tool climb from below to 300 px 22.-Duplicate again 23.-Vertical Mirror 24.-Merge Down and Opacity 80% 25.-Enable Copy Raster 4 and Opacity 60% 26.-Layers> new Raster Layer 27.-Selections> Load / Save Selection> Load Selection From Alpha Channel and locate Selection # 1 28.-Fill with your gradient Opacity = 30% 29.-Open, copy and paste into selection a Deco 30.-Apply the same Drop Shadow being negative and positive 31.-Image Effect> Offset 2 times as printe 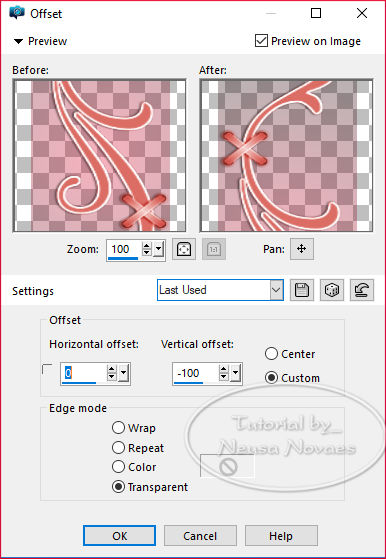 32.-Layers> new Raster Layer 33.-Selections> Load / Save Selection> Load Selection From Alpha Channel and locate Selection # 2 34.-Selections> Modify> Select Selection Border as printe  35. Fill with your backgraund 36.- 3 D Effects> Chisel put the color of your backgraund as printe  37.-Take the Selection and Horizontal Mirror 38.-Distortion Effects> Twirl as printe  40.-Activate Raster 2 and Layer> New Raster Layer 41.-Selections> Load / Save Selection> Load Selection From Alpha Channel and locate Selection # 3 42. Fill with the gradient Opacity 30% 43.-Open the deco again of Vertical Mirror, Copy, and paste in the selection 44.-Still selected apply the same Drop Shadow being negative and positive 45. - New Layer 46.-Selections> Load / Save Selection> Load Selection From Alpha Channel and locate Selection # 4 47. Fill in with your Backgraund 48.-Still selected apply Inner Bevel according to printe  49.-Take the selection 50.-With the magic wand tool select the center and apply drop shadow = 0 - 0 - 70 - 20,00 or to taste 51.-Adjust> One Step Photo Fix 52.-Abir your main tube copy and paste 53.-Adjust> Sharpness> Sharpen 54.-Apply Drop Shadow to taste 55.-The Raster should be as printe  57.-Image> Add Border = 4 px in color # e90129 58.-Image> Add Border = 4 px in black color 59.-Put mine and your mark 60.-Save in JPG
 |
