
Terms of use
2 or 3 Tubes
Medhi Plugin
Vanderlee Plugin
Tramages Plugin
AAA Frames plugin
Alien Skin Eye Candy 5 Impact Plugin
Muras Meister Plugin
AAA Filters Plugin
EML Tutorial
HERE
Video
HERE
-
PSP
Effects
-
-
MATERIAL HERE
-
SCRIPT
Click on the butterfly to follow
the tutorial

Enjoy and stay
at home !!!
Let's
start!!!
-
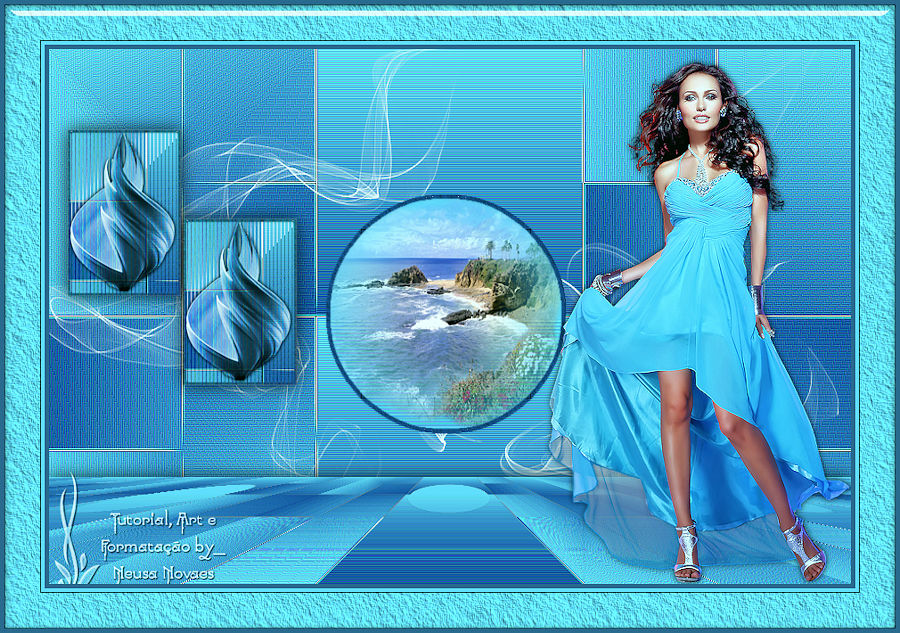
1.-Open your attached
Alpha_Myrian
2- I put it in Foregraund #
6adafd and Backgraund #
154f9e
3- Make a 0 x 1 Linear
gradient and fill the
transparency
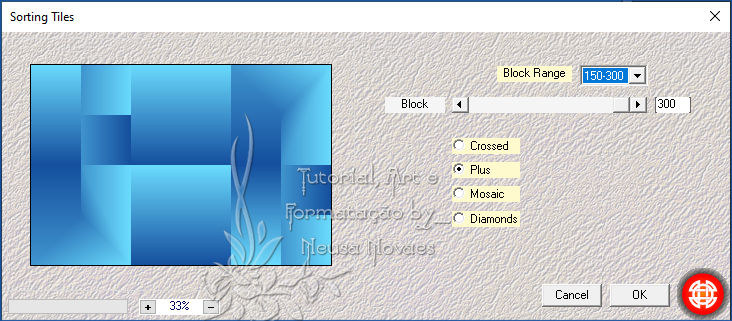
4.- Medhi Plugin> Sorting
Tile as shown
-
-
5.-Duplique
6.- Image > Mirror
Horizontal e Opacity= 60
7.- Merge Down and Enhance
More
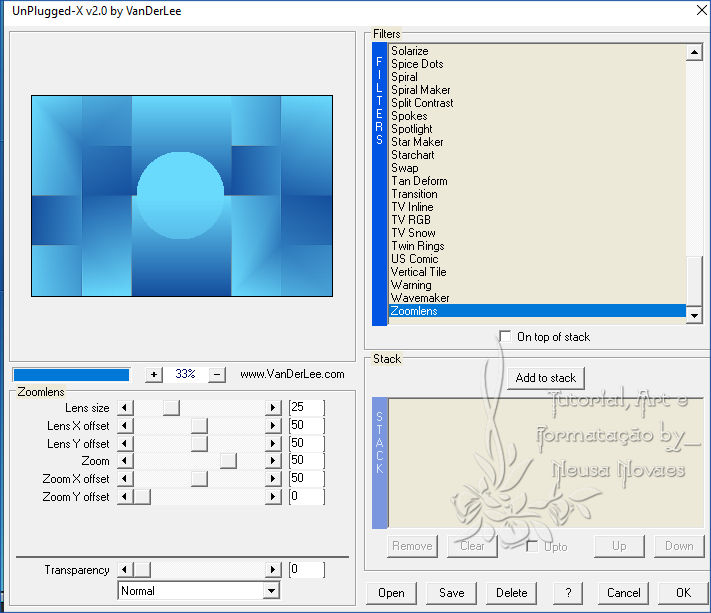
8.- Plugin Vanderlee >
UnPlugged X conforme
printe
-
-
-
9.-
Enhance More
10.- Selections> Promote Selection to
layer
11.- Selections> Load / Save Selection>
Load Selection from Alpha Channel =
Selection # 1
12.- Invert and Delete
13.-Invert again and Layers> New Raster
Layer
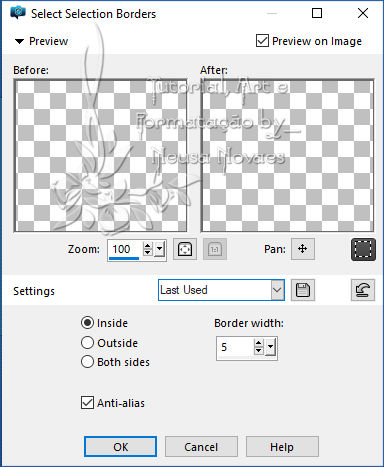
14.- Selections> Modyfi> Select
Selection Border as shown
-
-
-
15.-Fill with your Backgraund
16.- AAA Frames plugin> Texture Frame as
it opens
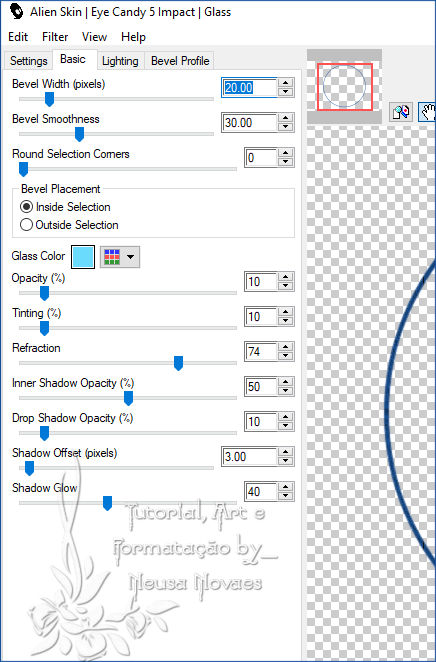
17.- Alien Skin Eye Candy 5 Impact>
Glass Plugin as shown
-
-
-
18.- Remove selection
19.- Activate selections> Promote Layers
20.- Selections> Load / Save Selection>
Load Selection from Alpha Channel =
Selection # 1
21.- Layers> New Raster Layer
22.-Open copy and paste into selection
the landscape
23.- Adjust> One Step Photo Fix and
Adjust> Sharpness> Sharpen
24.- Again activate the raster 1
25.- Selections> Promote to Layer
26.-Selections> Load / Save Selection>
Load Selection from Alpha Channel =
Selection # 2
Layers> New Raster Layer
27.-Repeat items 12 to item 18 and Open,
your tube deco and resize 30%
28.-Tramage Plugin> Town The Line as it
opens
29.- Paste your tube as into selections
30.- Adjust> Sharpness> Sharpen and add
shade to taste
31.- Merge Down 2 times
32.- Resize 60%
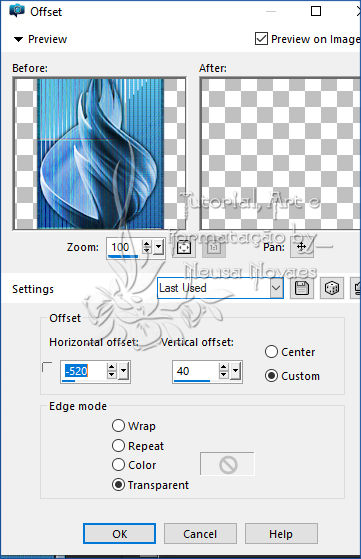
33.- Image Effects> OffSet as shown
-
-
-
34.- Duplicate
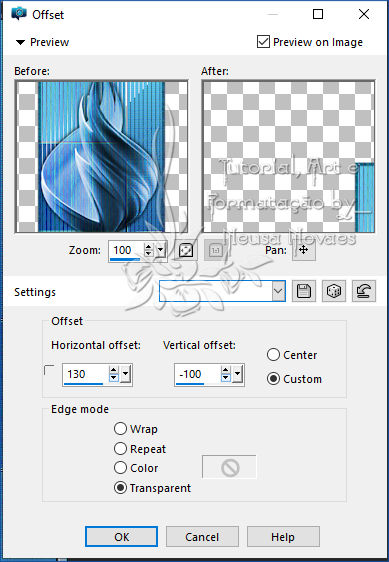
35.-Image Effects> OffSet as shown
-
-
-
36.- Merge Down and put shade to taste
37.- Activate raster 1 again and
duplicate
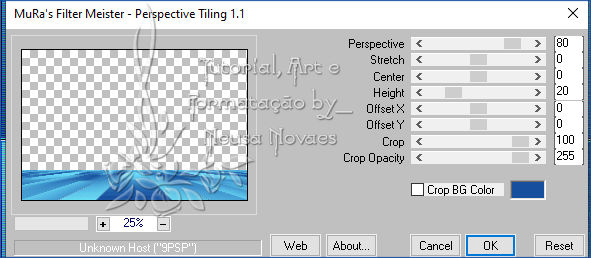
38.- Muras Meister Plugin> Perspective
Tiling as shown
-
-
-
39.-Put shadow to taste
40.- Open, Copy and paste the main tube
in a new layer
41.-Activate raster 1 and Layers> New
Raster Layer
42.- Fill in white
43.- Apply the Cickadesign mask (attached)
44.- Merge Group - Blend Mode =
Luminance
45.-Put your brand and mine and Merge
Down
46.-Image> Add Borders = 5 px color
Backgraund
47 .-- Image> Add Borders = 45 px in the
color of your foregraund
48.- Apply AAA Frames Plugin> Texture
Frames
49.-Alien Slkin Eye Candy Impact 5>
Glass Plugin as above
50.- Image> Add Borders = 5 px color
Backgraund
51.- AAA Filters plugin> Custom =
Landscape
52.- Resize = 900 px
53.- Save as JPG
-
-

-
-
-
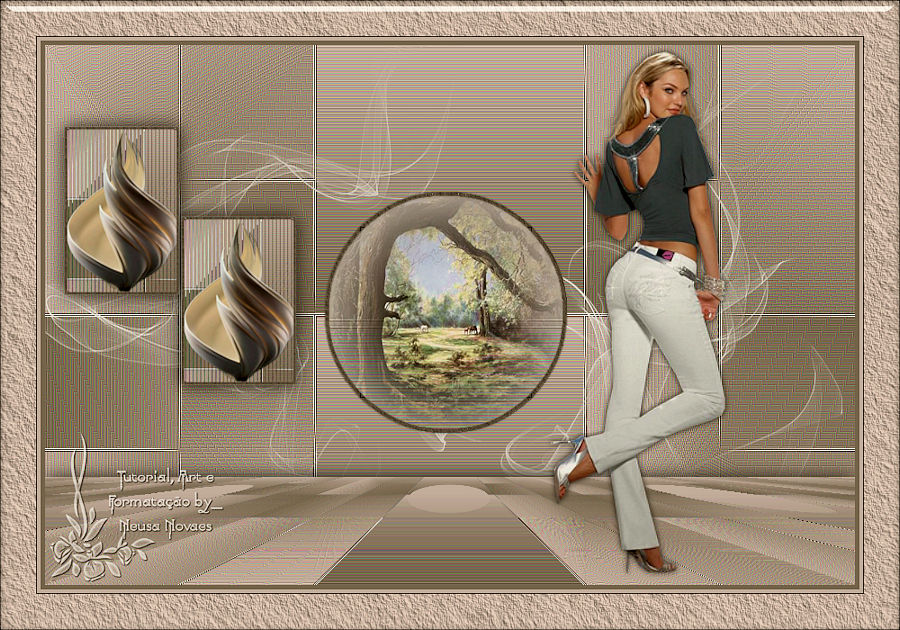
** Tutorial criado por Neusa
Novaes **
24 de Junho
de 2020
Direitos autorais reservados
Qualquer semelhança é mera coincidęncia.
Proibido repasse total ou parcial, cópias,
alteraçőes
publicaçăo em sites ou blogs, sem autorizaçăo da
autora.
OBSERVAÇĂO:- Năo esqueça de colocar os créditos a
quem de direito
 Créditos
Tubes Principal:-Azalee -
Grupo de trocas - Deco - Mask Cickadesign
Tubes
Versăo:-Beasol - Grupo de Trocas - Deco - Mask
Cickadesign Créditos
Tubes Principal:-Azalee -
Grupo de trocas - Deco - Mask Cickadesign
Tubes
Versăo:-Beasol - Grupo de Trocas - Deco - Mask
Cickadesign


Outras Versőes
Neusa Novaes
|