
Script Click on the butterfly to follow the tutorial Enjoy Stay at Home !!!
6.- Resize = 80% 7.- Mehdi Plugin> Sorting Tiles as shown 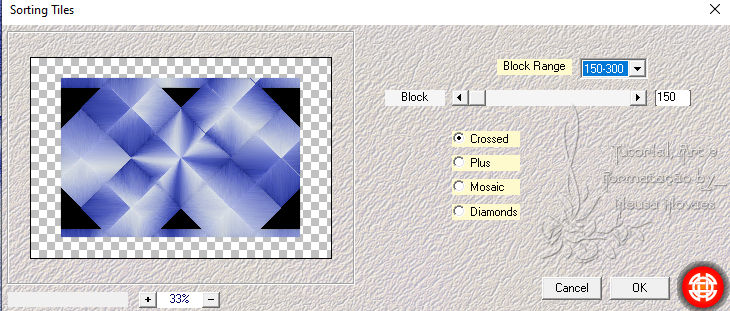 8.-Selections> Load
Selection from Alpha Channel
and locate Selection # 2 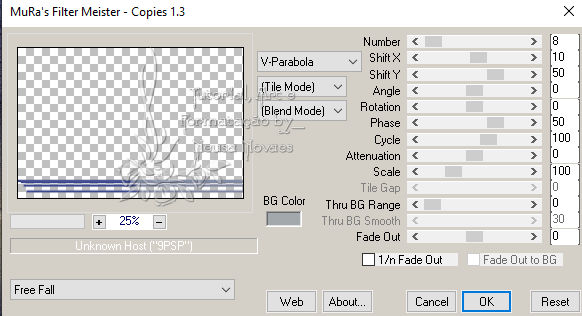
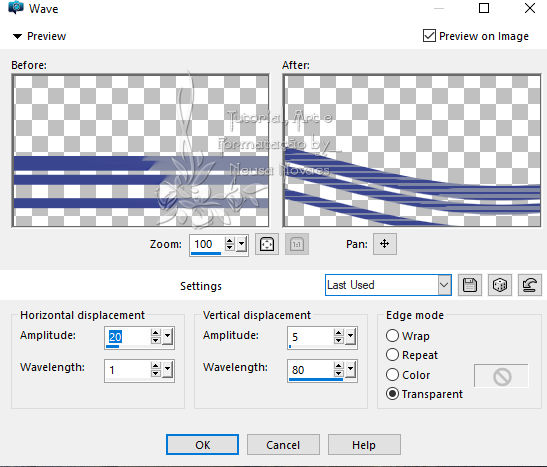
21.- Adjust> One Step Photo Fix 22.- Duplicate 23.- Image> Mirror Horizontal 24.- Image> Mirror Vertical 25.- Open, copy and paste the main tube in a new layer 26.- Rezise what is necessary 27.- Position to taste 28.- Sharpness> Sharpen More and Add shade to taste 29.-Your layers look like this: 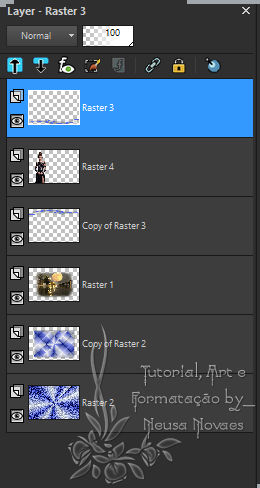 31.- Merge Visible 32.-Add Border 4 px contrast color 33.- Add Border 44 px dark color 34.- Activate the Magic Wand and select 35.- Paste Into Select what was booked 36.-VM Distortion Plugin> Center Mirror as it opens see the next 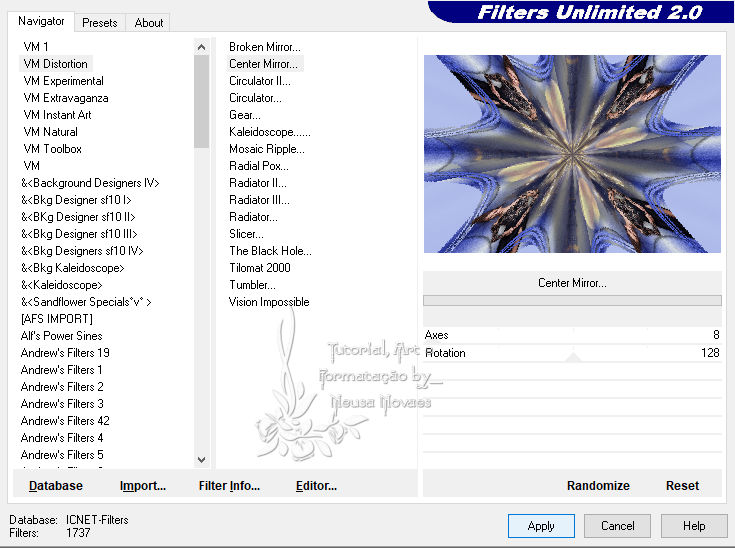
38.- Apply Drop Shadow = 0 - 0 - 80 - 60.00 black color 39.- Deselect 40.- Add Border 4 px the same contrasting color 41.- Resize = 900 px 42.-Layers> New Raster Layer put your brand and mine and Merge Visible 43.- AAA Filters plugin> Custom = Sharpen 44.- Save as JPG July 29, 2020 Any similarity is purely coincidental. Total or partial onlending is prohibited, copies, changes to publication on websites or blogs, without authorization from the author. NOTE: - Do not forget to place the credits to those entitled
Tubes: LB Tubes 

|